Got the drums off!!

Photo for Stovebolt people helping me with my drum brake situation.


Horn not working now-haha

Gremlins are out now that I have insurance, tags and I want to actually take the Stepvan out of the shop and go for a fun drive.
Horn stopped working. Really don't want to go out without it working so add another thing to the seemingly endless list.
Started testing the horn connections with some jumpers from the battery directly to the horns. There are two horns together to make a 2 note chord.
Upon testing the F note seems to work but the other one is shot.
Looks like I'll have to trace the wires back from the horn button to see if I'm getting power.
Really should get a horn relay and fix the horn button in the steering column but I want to go out and have some fun with this thing so a temporary horn willmhave to do!


Just noticed a lttle coolant on some of the radiator fins

Well bummer.
Almost ready for a test drive and I just noticed some drips of coolant on the radiator? Not too much coolant as the fluid is just sitting on the fins of the radiator and not on the floor.
Pictures below indicate this is a Harrison radiator.
From what I saw online this might be the original radiator. That would be surprising to me.
One on ebay for 400.00
Any suggestions for newer/better/less expensive?


Funny plastic tube with breather on it-falling out of the valve cover

What the heck is this junk? Its got a rubber grommet attached to a 90 degree plastic elbow with a breather filter on the other end?. It doesn't stay in the hole and it just falls loose out of the valve cover.
Need to replace it with something decent that stays put.

Trying to get the idle set and adjust the carb? Rochester Monojet

Idle is set really high and since this is a 3 speed manual stepvan the high idle makes it hard on the non synchro first gear of the transmission.
PO said he purchased a new carb for it and I noticed the stepvan was running funny at idle when I originally took it for the initial test drive.
I have been trying to find the idle circuit mixture screw and I have looked at many many online diagrams but don't see the screw on this carb?
Well, finally figured it out.
PO broke it off in the hole. Nothing sticking out. Was super lucky and was able to get it out by getting a little groove in it (its brass thank god). Then I was able to get a very small screwdriver in the groove to back the brass screw out of the hole.
The screw is sheared in half I can't measure its original length. Therefore, I don't know which new one would be the right one for this carb. Apparently there are two possibilities according to Mikes carburetor parts? Ordered them both and they should be here by the end of the week.
Hopefully, one of them will be right and I can get it all tuned for idle and go for a test drive-pending my newly found radiator issue.


Cant stop now! Continuing interior work. Drivers seat is now a step van seat

Interior passenger compartment floor plate was in rough shape so I wire brushed it and reinforced the floor underneath with some aluminum channel.
Then I installed a new stepvan seat that will fit with the style of the stepvan better than the passenger seat the PO was using.


Time to dress this out! Exterior Paint and aluminum trimwork

The aluminum trimwork will set off the 2 tone paint job and stiffen up the walls. I'm pretty happy with the paint! It looks really tough and has a metallic pearl effect that looks great. The aluminum trim divider pieces bring out some of the metallic look of the paint out.
Also restored the logos. Pretty happy with how everything turned out.


Interior birch plywood work is coming along. Drivers seat issue.

Sealed the interior birch wall panels with the first coat of marine grade epoxy and now I'm going for a white interior in the back. Want to keep it bright on the inside.
Don't like the drivers seat the PO put in at all. Going to have to figure out something for that? I think I'm going to get a real step van seat for the drivers side and take out the one the PO put in.
Biscuits for attaching large pieces of plywood sheets together and then epoxy sealer.


Good weekend so its finish paint prep and start painting time

Epoxy filler for all the holes. Then more sanding and full epoxy topcoat to seal it all in before finish coats.
Going with a hammered look. Ended up choosing Metallic Blue up top and Metallic Charcoal on the bottom for the paint colors.
Also going to make a divider out of aluminum to separate the bottom and top of the stepvan where the factory divider is-about a third of the way up from the bottom skirt. I think that will bring together the 2 colors and give it a more finished look.


Weather finally broke and I'm making some progress

Sanding it all down and going to 2 part epoxy everything to seal the rust for good..
Also cutting the interior wood panels down for the inside and going to epoxy seal all of those too.


Rigid insulation for the back before Birch Plywood wall panels

Put a few layers of rigid insulation in the back. Going to cover that with some nice birch cabinet grade plywood to clean up the back interior.


Winter is slowing me down big time!

Too cold to work in shop. Heater can't keep up on these really cold days.
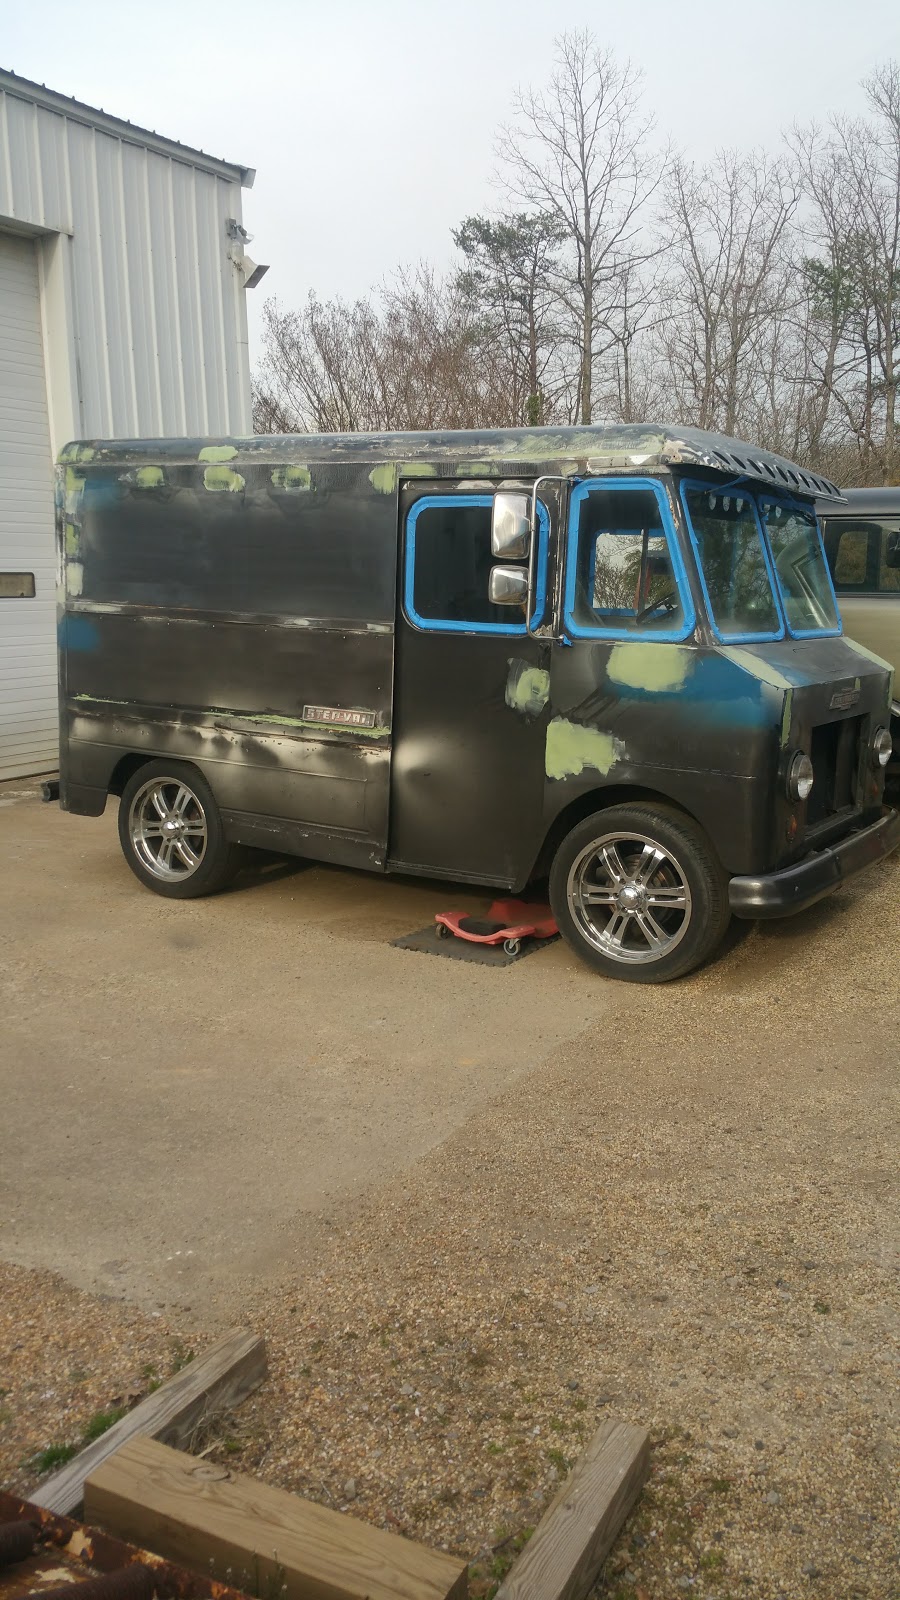
So not too much progress on the P10 Stepvan.
I have been able to cut rigid insulate for the back and finish taking out the old stereo and some unnecessary cables.
On the upside, I scored some nice high grade cabinet plywood and I have started laying out and cutting for the back interior panels. Going to set it up as day trip van for events.
Also, spent some time looking at the wiring and it definitely needs some cleaning up. I'm going to create a wiring diagram for it and slowly upgrade it little by little.
When the weather warms up, the plan is to paint the outside, seal the birch plywood, finish painting the outside and start driving it around for fun.
Will need to figure out the insurance and tag stuff also.
It won't be perfect by any means but nice enough to enjoy!

Continuing the clean up and started sanding

Been working on cleaning up the interior and removing exterior parts like the police spotlights, taking off stickers and other miscellaneous items the PO had on it.

Also started sanding the roof, sides and interior. Going to seal everything with 2 part epoxy. 1 coat of the epoxy on the roof is already done.
Getting colder here in Northern Va so don't know how much more I will get done before winter slows things down?

First Challenge After Driving off trailer she won't start now??

Well after driving around in the stepvan before buying it, now its cold and it won't start. I'm prolly flooding it out.
Got to figure out what carb it is?
Also could be the fuel pump pumping with too much pressure to the carb?

Spent some time and figured out it is the Rochester monojet carb the PO put on.
Don't think its the carb cause it won't start even with starter fluid. So, I think its spark related.
Checked out the wires to  the distributer and the problem was a loose wire to the ignition module. Vibration over time caused it to break at the crimped joint. All good now she starts up and runs great again!

New stance with updated wheels and tires

Restomod here we come.